Knowing how to check the RAM installed in your laptop can greatly improve its performance. RAM, or Random Access Memory, plays a crucial role in the speed and efficiency of your device. When you know your laptop’s RAM specifications, you can better understand how well it will handle various tasks. In this guide, we’ll walk through several methods to check your laptop’s RAM, both on Windows and Mac systems.
Why It’s Important to Check Your Laptop’s RAM
When you know your laptop’s RAM capacity and type, you can make informed decisions about potential upgrades. Many applications and operating systems have specific RAM requirements for smooth performance. Understanding how much and what type of RAM you have is essential to maximize your laptop’s efficiency.
What You Need to Know About RAM Specifications
RAM specifications include factors like capacity, type (such as DDR3 or DDR4), and speed. Capacity refers to the amount of RAM available, while the type and speed determine how quickly it can access data. When you check RAM specifications, you’ll better understand whether it meets your needs.
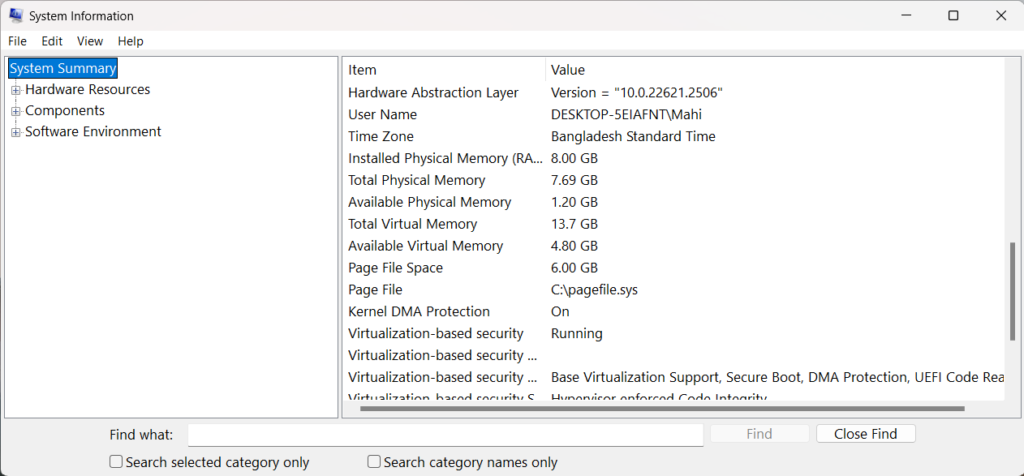
How to Check RAM on a Windows Laptop Using System Information
Windows laptops have a built-in System Information tool that displays RAM details. To checking RAM, follow these steps:
- Press Windows + R to open the Run dialog.
- Type
msinfo32and press Enter. - In the System Information window, look for “Installed Physical Memory (RAM).”

This method provides a quick overview of your RAM capacity.
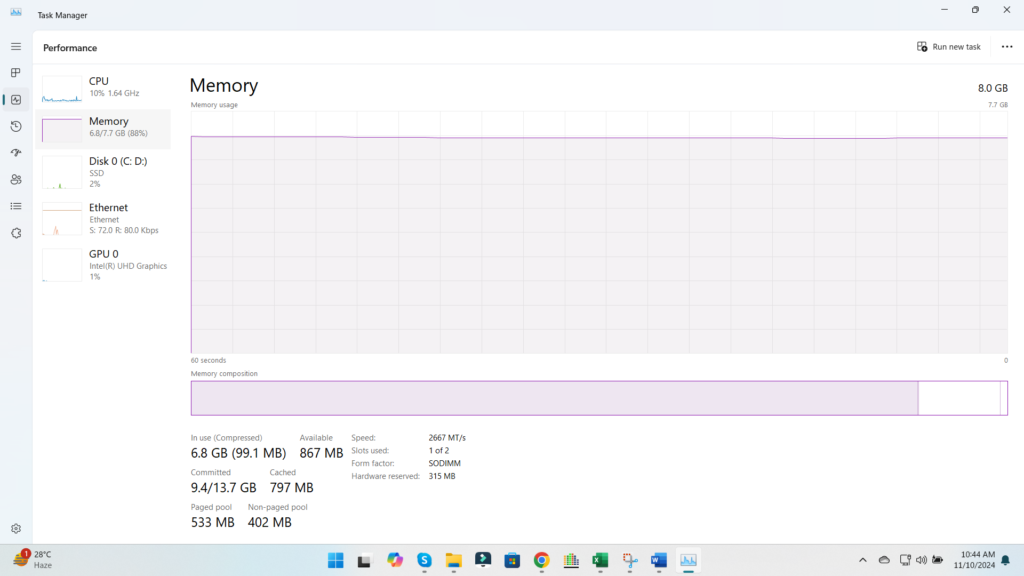
Checking RAM with Task Manager on Windows
Task Manager is another tool to quickly check RAM in Windows. Here’s how:
- Press Ctrl + Shift + Esc to open Task Manager.
- Go to the Performance tab.
- Click on Memory to see detailed RAM information.

Task Manager shows RAM usage, speed, and how much is currently in use.
Using Command Prompt to Check RAM on Windows
Command Prompt offers a command-line method to check RAM. Follow these steps:
- Open Command Prompt as an administrator.
- Type
wmic memorychip get capacity, speed, memorytypeand press Enter.

This command displays RAM capacity, speed, and type, giving you an in-depth view.
How to Check RAM on a MacBook Using About This Mac
Mac users can easily check RAM through the “About This Mac” feature:
- Click the Apple logo in the top-left corner.
- Select About This Mac.
- Under the Overview tab, view your Mac’s RAM specifications.
This method gives you an immediate overview of your MacBook’s RAM capacity and type.
Using Activity Monitor to Check RAM on a MacBook
Activity Monitor offers another way to view RAM details on a MacBook. Here’s how:
- Open Activity Monitor from the Applications > Utilities folder.
- Click on the Memory tab to see detailed RAM usage.
This view shows how much memory is being used, along with other helpful insights.
Understanding RAM Types and Compatibility
Laptop RAM comes in different types, such as DDR3, DDR4, and DDR5. Before upgrading, make sure your laptop supports the RAM type you want. Checking RAM type helps ensure compatibility when planning upgrades.
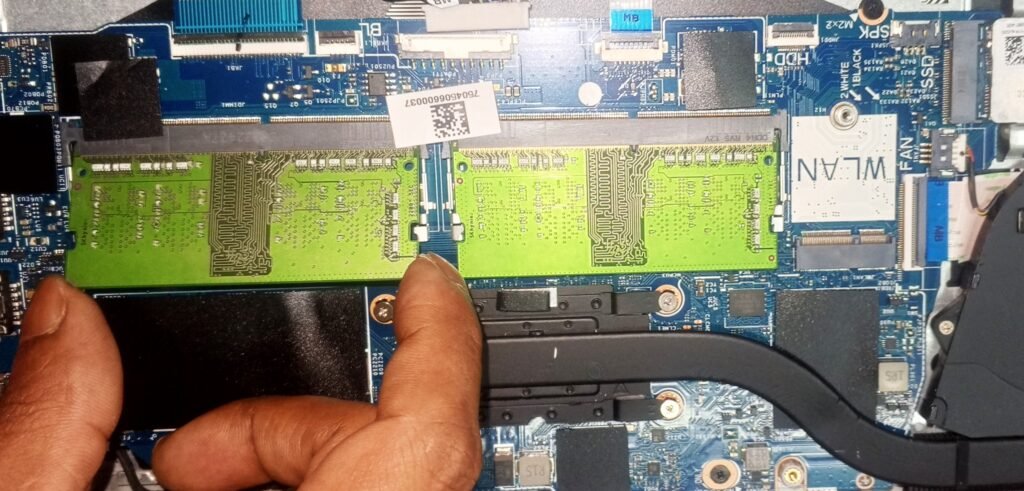
How to Physically Check RAM Slots on Your Laptop
If you’re planning a RAM upgrade, you may need to check the physical slots. To do this:
- Power off your laptop and unplug it.
- Open the back panel carefully.
- Check the number of RAM slots and whether any are available.
This method lets you see if there’s space to add additional RAM sticks.
Tools to Check RAM Information in More Detail
There are several third-party tools available to checking RAM details, such as CPU-Z for Windows and iStat Menus for Mac. These tools offer deeper insights, showing specifications like CAS latency, voltage, and manufacturer details.
How Much RAM Do You Need?
The amount of RAM you need depends on your usage. For basic tasks, 4GB to 8GB is often enough, while high-performance tasks may require 16GB or more. Checking RAM can help you decide if you need an upgrade.
Steps to Upgrade Your Laptop’s RAM
If you decide to upgrade your RAM, follow these steps:
- Check the maximum RAM your laptop supports.
- Buy compatible RAM.
- Power off and open the laptop.
- Insert the new RAM module into an available slot.
This process can enhance your laptop’s performance significantly.
Benefits of Checking Your RAM Regularly
Checking RAM periodically can reveal issues such as high memory usage or potential hardware failures. Monitoring RAM helps you stay aware of your laptop’s performance and make upgrades when needed.
Troubleshooting Common RAM Issues
If you encounter frequent crashes or slow performance, it may be due to RAM issues. Use the diagnostic tools discussed to troubleshoot and see if your RAM is functioning properly.
Final Thoughts on Checking RAM in Your Laptop
Understanding how to check your RAM not only helps maintain your laptop’s performance but also guides you in making smart upgrade choices. With these straightforward methods, you can quickly and easily check your laptop’s RAM, ensuring it continues to meet your needs well into the future.
- RAM replacement: Everything you need to know


